How to create the perfect artwork and expose Photopolymer plates
Using Photopolymer plates for metal clay!

How a Printmaking Technique Changed My Metal Clay Work — 20+Years On
It’s wild how time slips by. I can hardly believe it’s been over twenty years since I first started experimenting with photopolymer plates in metal clay.
Back then, these plates weren’t part of the jewellery world at all. They were industrial tools — used for printing designs on cardboard boxes and other packaging — and of course by printmakers like me.
I’d learned photo etching and block printing back in art school, and I loved how precise and graphic the results could be. But after graduating, life moved on, and my plates were packed away and forgotten.
That is, until metal clay came along.
If you’ve ever worked with metal clay, you know how soft and floppy it can be when wet — beautiful for organic shapes and flowing textures, but not so great when you want crisp, structured lines.
I was working on champlevé enamels at the time and kept wishing for a way to get fine, controlled detail.
Then one day it hit me — maybe I could use photopolymer plates!
So I dug them out, dusted them off, and began to test. The first time I pressed a design into the clay, I knew I was onto something. The results were sharp, repeatable, and had that perfect mix of precision and handmade texture I’d been looking for.
When I shared my experiments on the metal clay forums, I received an instant response. People wanted to know everything — the process, the exposure times, the tools.
That excitement carried me all the way to the 2006 PMC Conference in the USA, where I presented the technique for the first time.
Not long after, I was back on stage for a second presentation — this time about how to create the artwork itself, using Photoshop or similar image-editing software. It felt incredible to see something I’d rediscovered in my studio spark so much curiosity in others.
These days, I use Affinity Photo instead of Photoshop, and I can print out exactly what I need with far more control than I had in those early days. Even now, whenever I finish a plate and see the design imprinted on it, I still feel that same spark of wonder I did twenty years ago — the joy of discovering something new, using a technique I had discarded!
So let’s have a look at how it’s done…
How to Prepare the artwork for a Photopolymer Plate
A FEW key points you need to remember:
All artwork has to be Black and White, no greys!
Don’t make your lines too fine, the PPP can take it but it’s nearly impossible to get the clay out of those lines in one piece.
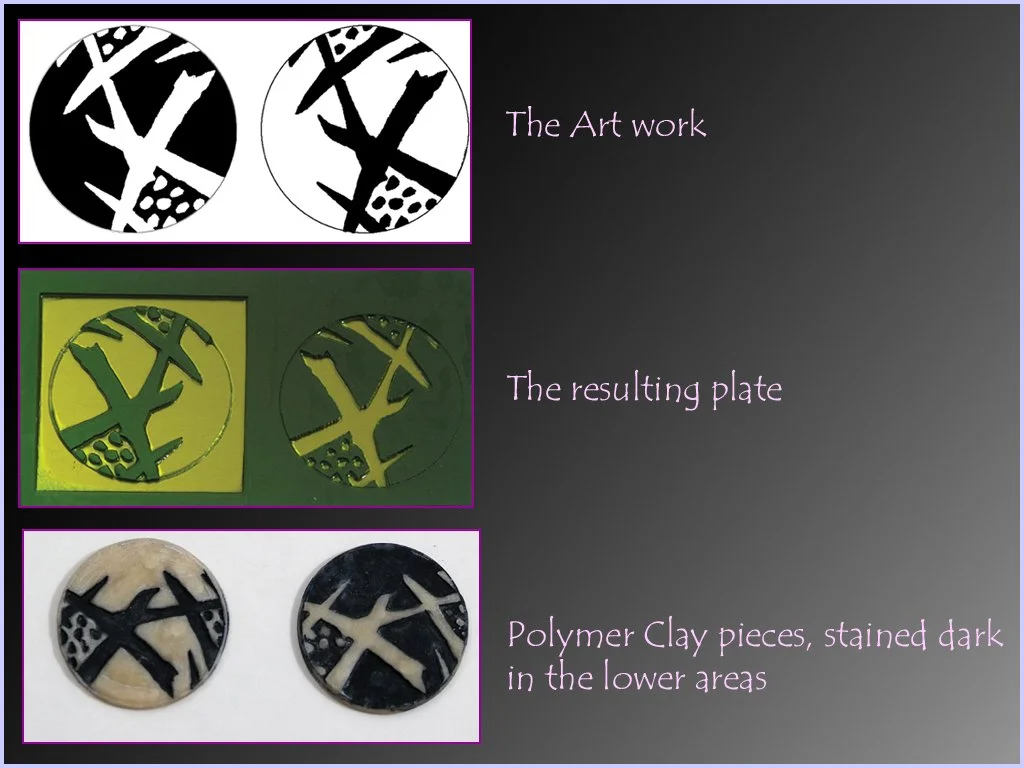
Whatever is black in the artwork will be raised silver in the finished metal clay piece.
The metal clay will shrink, each brand is slightly different. Check your manufacturer’s instructions and make sure to adjust the size of your design to allow for that.
If you are using text you need to make your artwork mirror image, you can do this by place it upside down on the plate in the exposure unit.
Create or scan the art into your computer using a 300 dpi resolution. This will give you enough fine detail while working on it in your image editor ( Photoshop or Affinity Photo) but without too much clutter.
In Photoshop (or equivalent) go to: Image > Adjustments - in the Menu bar - increase the contrast by using Levels, and then add contrast to get a perfect black and white image. Aim for a good balance of black & white lines. Make sure you have enough white space around the print, this prevents unwanted marks on your clay later.
Double up the image in Photoshop, so you’ll print out two identical prints next to each other as one image. If your artwork was done to be correct for the PPP you’re all done. if you need to invert to colours you need to do that now. (remember black will be high, while white will be low in the finished silver piece)
Print onto an overhead transparency at the highest quality your printer will allow. If you are using an inkjet printer you need to get special transparencies, most brands have their own, but generic inkjet brands work fine as well. Any large office supply store stocks these.
Cut the transparency in half so you have 2 separate images, cut one bigger that the other to make it easy to tape them together.
Place imges on top of each other so they line up perfectly → putting them on a sheet of white paper makes it easier to see the fine detail. Use clear sticky tape on 4 sides to keep images securely together. You are now ready to make a Photopolymer plate!
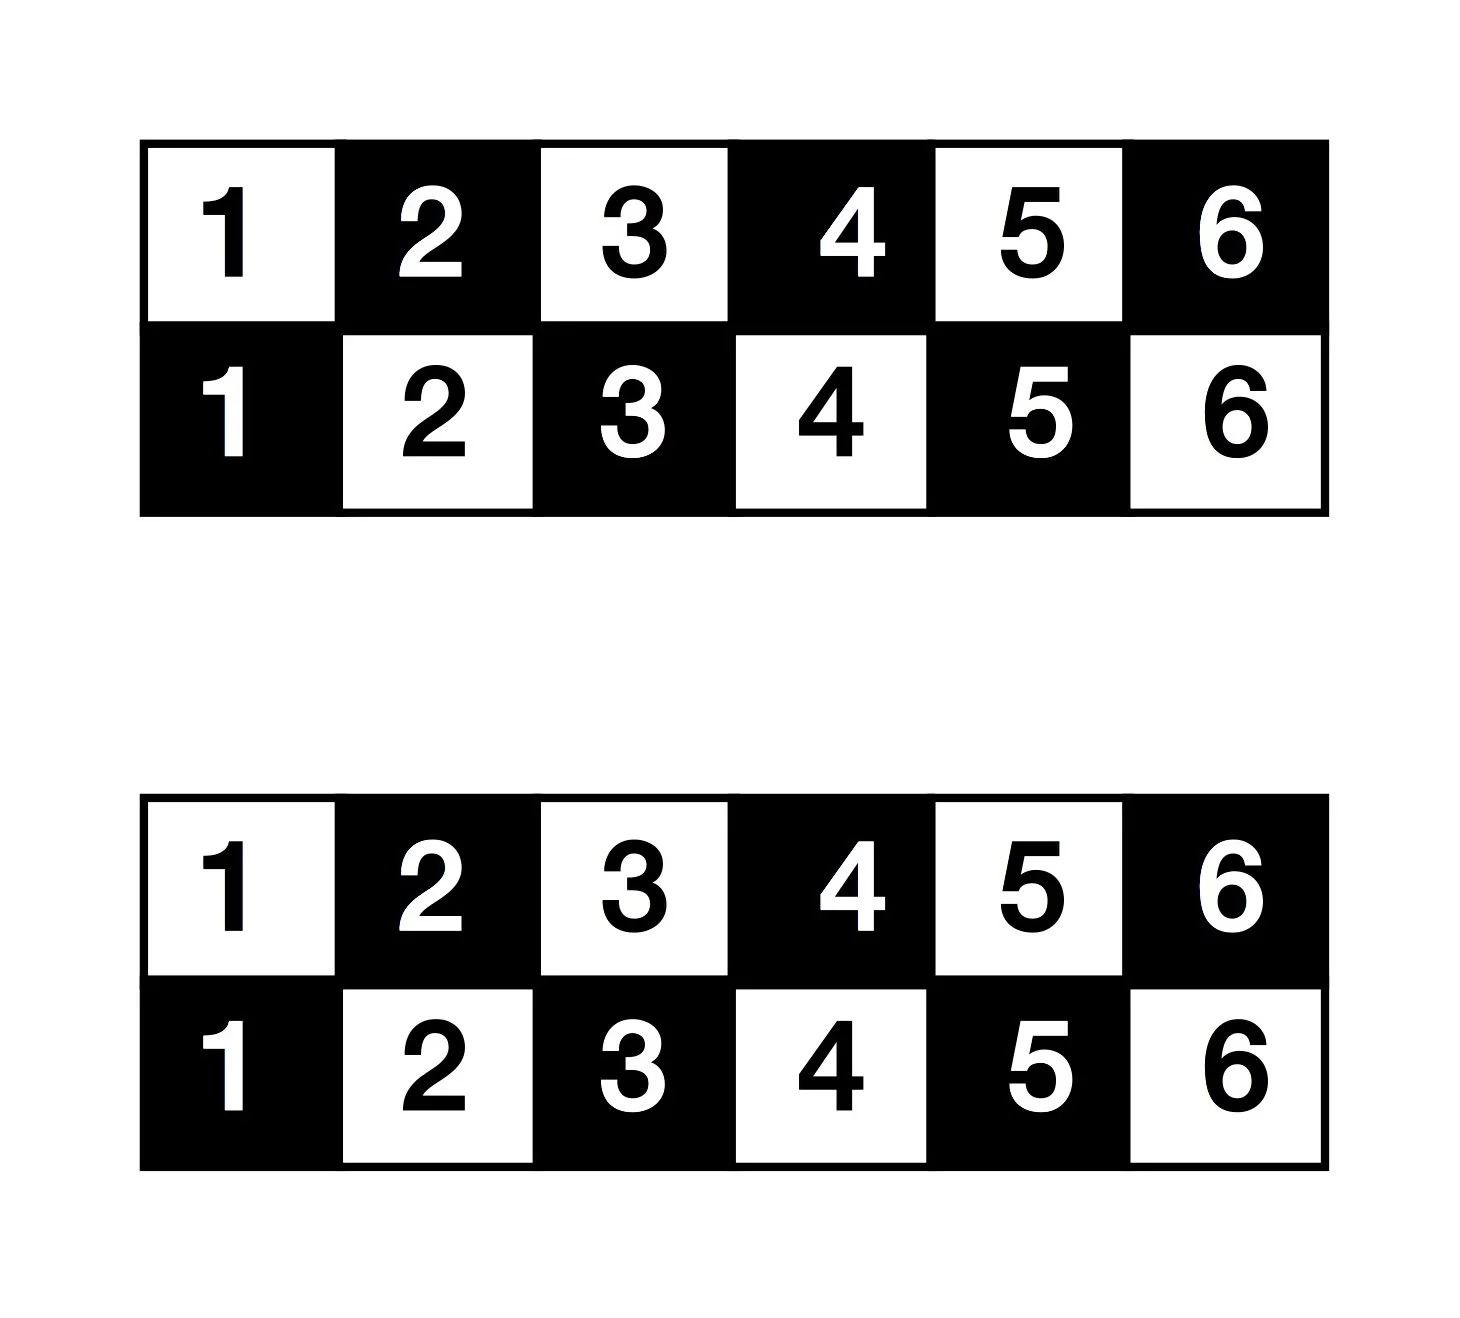
Please feel free to download this image and use it to determine the exposure time required for your own UV unit. You might need to scale it to fit; mine is 10cm (4”) long.