Two Super Easy Ways to Transfer a Stencil Design to Heavy Card.
Find out how!

The Joy of Hand-cutting a Stencil
Hand-cutting a stencil can be a very relaxing activity — the quiet focus, the steady cut of the blade, the joy of working slowly, quietly, mindfully.
However, before you can start cutting, you’ll need to transfer your design onto the heavy card required for a stencil, and that can be tedious work.
When your cardstock is too thick to go through your printer, you’ll need to find another way to get the job done.
Here are two reliable methods that will transfer your design onto cardstock easily and accurately.
2 Ways to Transfer a Stencil Design to Heavy Card
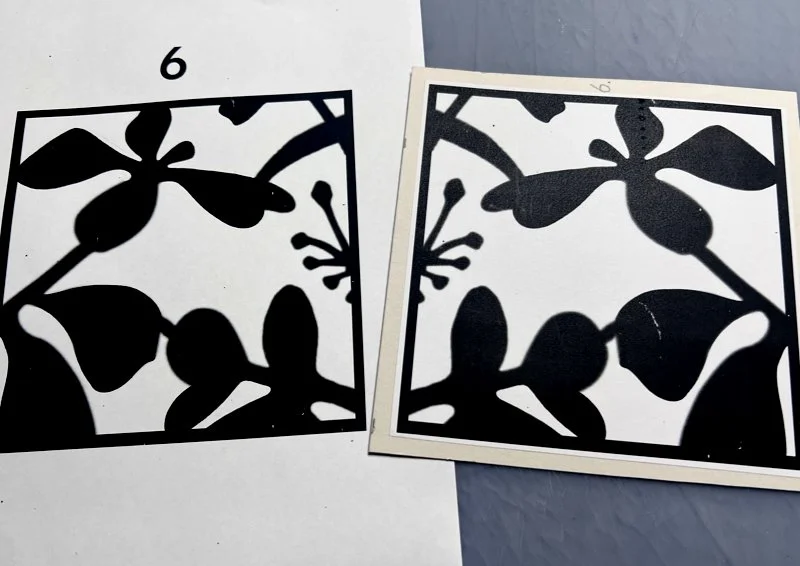
Reversed print full sheet label image transfer for hand-cutting a stencil.ansfer
1. Use a Self-Adhesive Label - Quick - Easy & Super Accurate
This is the fastest and most precise method imaginable.
For this process, you'll need full-sheet self-adhesive labels that are compatible with your printer.
How to do it:
Reverse your design in an image editing program (Photoshop Express, Affinity Photo, etc.). This is especially important when working with letters. If you’ve drawn your design digitally, it’s even easier to transform and flip it horizontally.
Print it onto a full-sheet self-adhesive label. For this method, both an inkjet and a laser printer will work.
Cut your stencil card to size, adding a little extra space all around. This will keep the card’s edges stronger while you’re cutting.
Stick the printed label onto the back of your stencil card.
Cut the design through both layers. The added thickness of the label will be hardly noticeable.
This method is quick and will give you crisp lines as well as excellent accuracy!
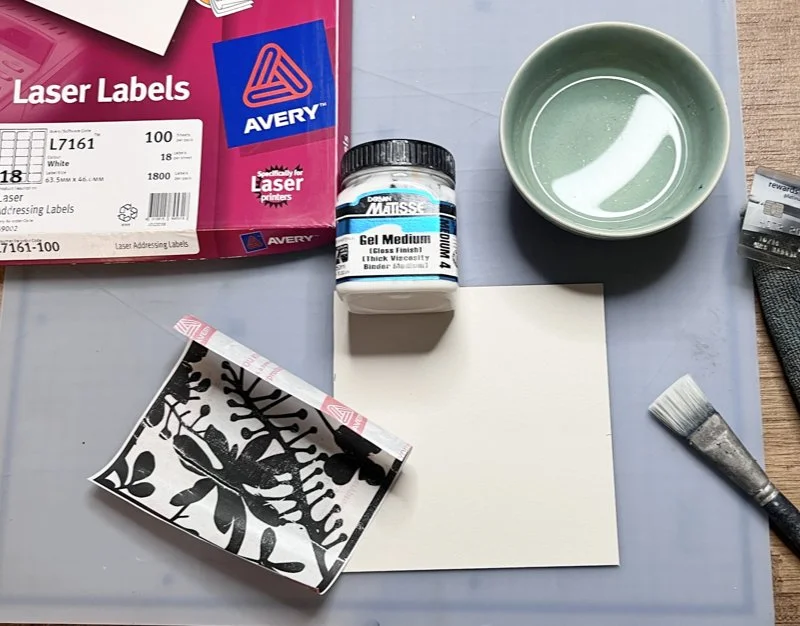
You only need a few simple, safe materials for this image transfer process
The Image Transfer Process (Step-by-Step)
What You’ll Need
Access to a Laser printer - Inkjet will not work
Label backing paper - remove all the labels and edges
Heavy stencil card
Kraft knife
Steel ruler
Mod Podge or Gel Medium
Flat brush
Old credit card or scraper
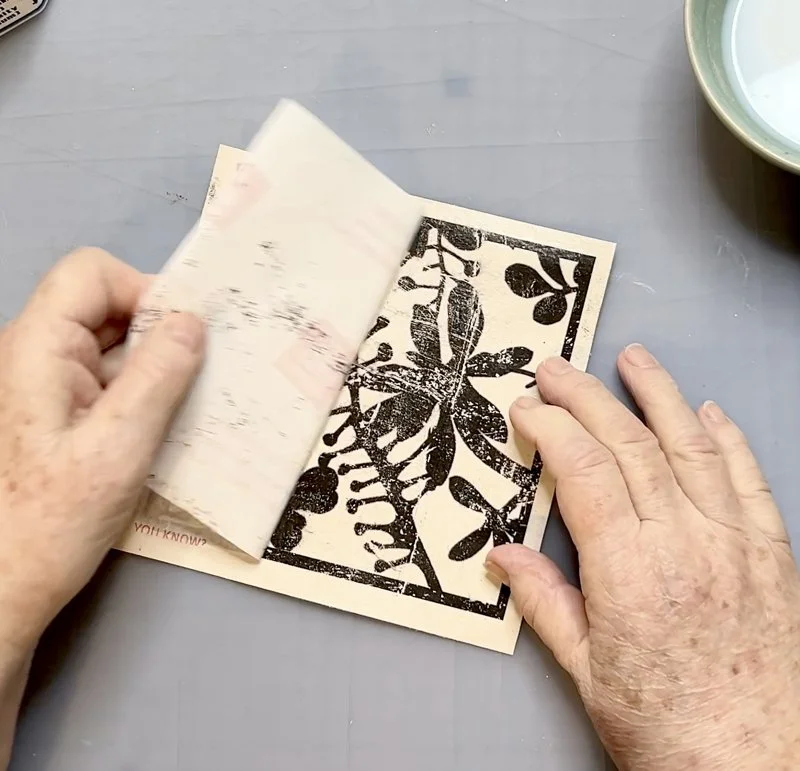
Peeling off the transfer label to reveal the print ready for cutting
And that’s all there is to it, simple, isn’t it?
I hope you’ll get to try one of these methods. I prefer to use the full sheet labels for hand-cutting stencils, but you can use the second technique to transfer an image to just about anything; a Lino block, timber, metal and more. As a rule, I test if the Gel Medium will stick to the material; it will generally hold an image transfer!